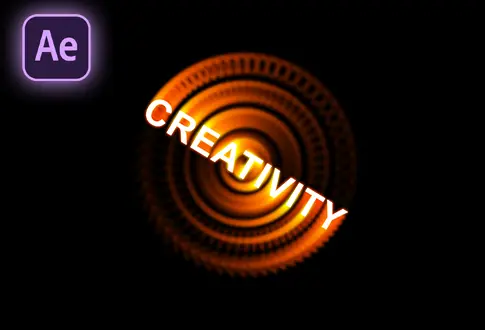
Metal Logo Animation in After Effects
It’s free and I will continue to give out free downloads!
Metal Logo Animation in After Effects
In this tutorial, we will create a stunning metal logo animation using Adobe After Effects. We’ll guide you through each step, from setting up the composition to adding special effects. This animation gives your logo a sleek, metallic look with a dynamic light sweep effect.
The metal logo animation adds a professional and polished touch to your logo. It features a shiny, reflective metal surface and smooth light sweep transitions that make your logo stand out.
Usage
You can use this metal logo animation for:
- Company Intros: Add a professional touch to your brand’s opening sequence.
- YouTube Videos: Enhance the quality of your video intros and outros.
- Presentations: Make your slideshows more engaging and visually appealing.
- Promotional Materials: Elevate the look of your promotional content.
Follow this tutorial to give your logo a sophisticated and eye-catching metallic finish. If you find it helpful, don’t forget to like and subscribe to Rizat Graphics for more tutorials. Your support motivates us to create more content! You might also be interested in this tutorial on the Gold Particles logo Reveal in After Effects.
Step-by-Step Guide to Creating a Metal Logo Animation:
Step 1: Create a New Composition
- Open Adobe After Effects.
- Create a new composition. Name it “Metal Logo Reveal”.
- Set the resolution and frame rate as usual.
- Set the duration to 10 seconds.
Step 2: Import Files
- Import the necessary files for the project.
- Drag and drop the logo into the main composition.
- Reduce the logo scale if required.
- Right-click the logo layer and choose “Pre-compose”. Name it “Logo Comp” or any preferred name.
Step 3: Create the Blob Layer
- Duplicate the logo layer.
- Right-click the duplicated layer and choose “Pre-compose”. Name it “Blob”.
- Double-click the Blob composition.
- Select the Logo Comp.
- Go to Effects & Presets, search for and apply the Fill effect.
- Change the Fill color to white.
Step 4: Prepare the Main Composition
- Return to the main composition.
- Select the Logo Comp and duplicate it.
- Hide the duplicated layer.
- Import the metal image into the composition.
- Hide the metal image and the Blob composition.
Step 5: Create the Light Sweep Effect
- Create a new composition. Name it “Light Sweep”.
- Right-click on the empty space and create a solid layer. Name it “Light Sweep” or any preferred name.
- Go to Effects & Presets, search for and apply the CC Light Sweep effect.
- Change the Light Direction to 0 degrees. Adjust the light’s position using the small circle.
Step 6: Animate the Light Sweep
- Move the time cursor to 10 frames.
- Add a keyframe on Center.
- Move the time cursor to 4 seconds.
- Adjust the light sweep position using the small circle.
- Change the Shape to Smooth.
- Set the Width to 60.
- Set the Sweep Intensity to 52.
- Set the Edge Intensity to 0.
- Set the Edge Thickness to 0.
- Duplicate the Light Sweep layer.
- Press ‘U’ to reveal all keyframes.
- Move both keyframes to the first frame.
- Drag the second keyframe to 3 seconds.
- Change the Width to 100.
- Change the Sweep Intensity to 29.
Step 7: Add More Light Sweep Layers
- Duplicate the bottom Light Sweep layer.
- Move the duplicated layer to start at 2 seconds.
- Change the Width to 200.
- Change the Sweep Intensity to 52.
- Select all Light Sweep layers.
- Change the layer blending mode from “Normal” to “Add”.
Step 8: Preview the Light Sweep Animation
- Preview the light sweep animation. Make sure it looks perfect.
Step 9: Apply Effects to Light Sweep
- Go back to the main composition.
- Drag and drop the Light Sweep composition just below the Logo Comp.
- Go to Track Matte and choose Alpha Matte.
- Preview the animation.
Step 10: Apply Additional Effects
- Select the Light Sweep composition.
- Go to Effects & Presets, search for and apply the CC Glass effect.
- Change the Bump Map to Metal image.
- Set the Property to Luminance.
- Change the Softness to 2.2.
- Set the Height to 50.
- Search and apply the CC Blobbylize effect.
- Change the Blob Layer to Blob.
- Set the Property to Alpha.
- Change the Softness to 5.
- Set the Cut Away to 60.
- Under Shading, set the Ambient to 102 and Diffuse to 50.
- Search and apply the Curves effect. Slightly adjust the curve.
- Search and apply the Tint effect. Change the white color to light blue (Color Code: BFD8EB).
Step 11: Final Adjustments
- Right-click on the empty space and create an adjustment layer.
- Search and apply the Sharpen effect. Set the Sharpen value to 8.
- Apply the Noise effect. Set the Noise amount to 2.2 and uncheck “Use Color Noise”.
- Search and apply the Curves effect. Adjust the curves as needed.
Step 12: Reveal the Original Logo Colors
- Select the Logo Comp and unhide it.
- Move the time cursor to 3 seconds.
- Right-click the Logo Comp, go to Effects > Transition, and choose Linear Wipe.
- Change the Wipe Angle to -90.
- Set the Transition Completion to 100%. Add a keyframe.
- Move the time cursor to 5 seconds and 6 frames.
- Set the Transition Completion back to 0%.
- Change the Feather value to 150.
Project File Details:
| Updated | September 16, 2024 |
| Compatibility | After Effects CC |
| Required Plugin | No |
| Size | 1.5 MB |
| Price | Free |